
Setting up your vendor account

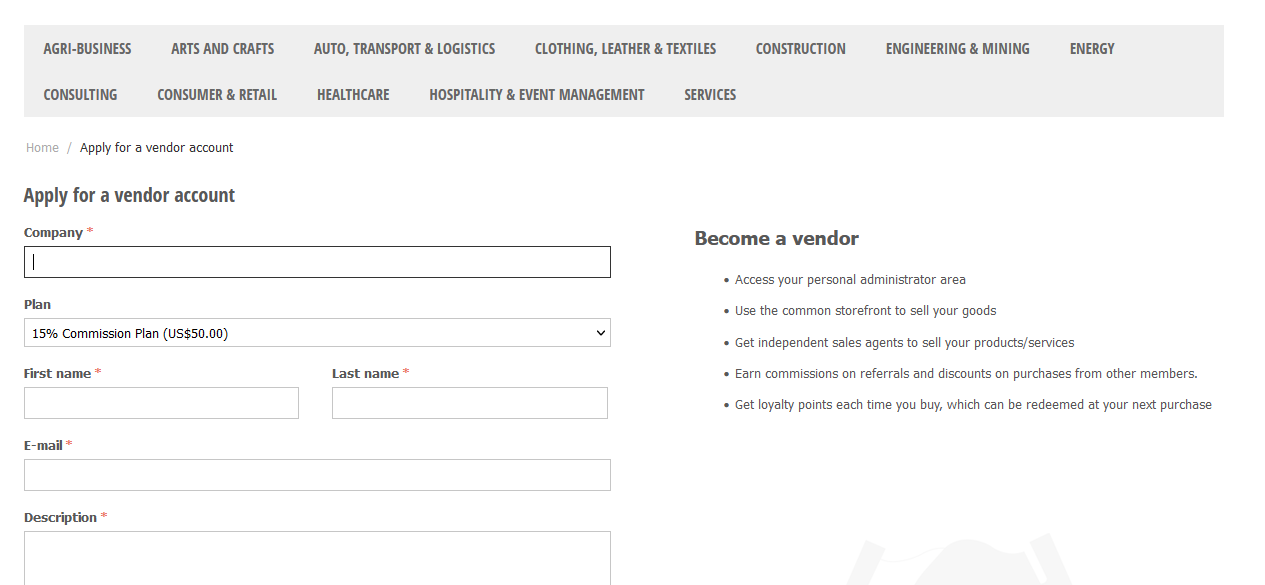
Preliminary activities for becoming a vendor are contained in the article here. Once you have become a member of the SME Association of Zimbabwe, you can register as a vendor. The registration page is as below. Key considerations are:
- Ensure you use normal capitalisation (i.e. capitalise first letter, then normal caps for everything else, except for abbreviations).
- Write your company name exactly as you want customers to see it.
- Your company description should be short and concise. Simply describe what you do as a company, preferably in not more than three sentences. Do not use hyperbolic or flowery/marketing language, but rather just describe yourself in neutral terms.
After completing the initial registration page, you submit the application for approval, which normally is done within a short time (less than 24 hours) provided your membership is active.
Once approved, you can go to the login page and enter your username and password, which will take you to the vendor back-end. The dashboard gives you summary information regarding your Online Marketplace.
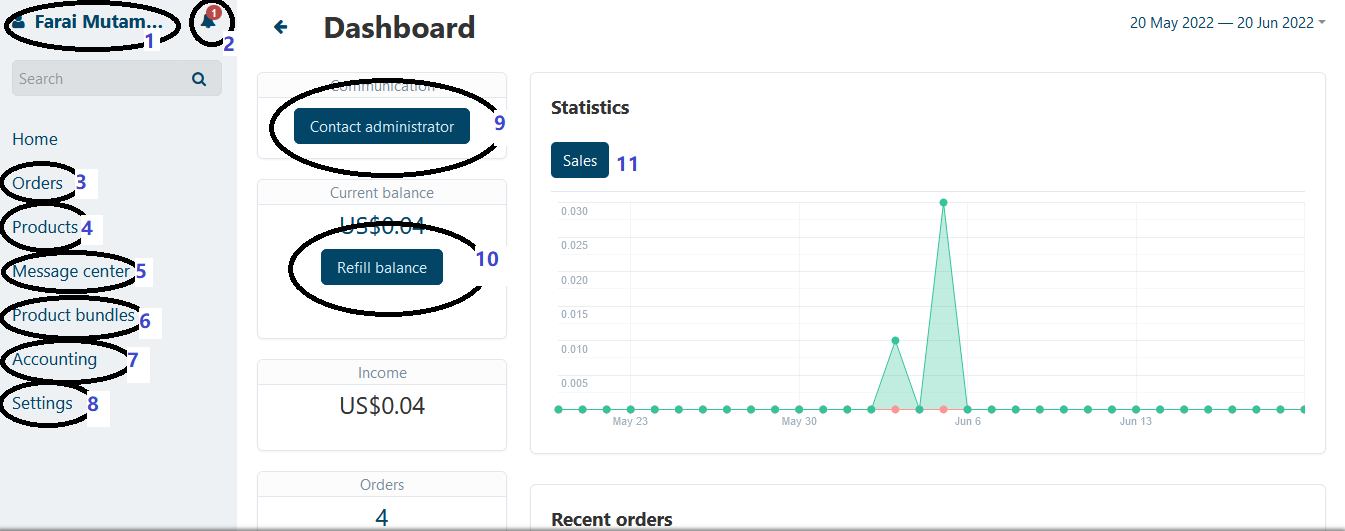
Key features of the dashboard by order of the numbers indicated above are:
- The vendor name section. You can click here to change the currency, edit your profile or edit your business' description on the front end of the site.
- Notifications: this gives you any site notifications, whether administrative, or notifications of customer activities.
- Orders: orders placed by customers, as well as their status, will be shown here. You will also get e-mail notifications.
- Products: you add your products, as well as product features here. It is important to ensure that products and features are set up in the best way possible. Read this article for details on setting up product features.
- Message center: messages from customers, or from us as the site administrators will be shown here.
- Product bundles: you can bundle products that are often purchased together, or create your own product combos which feature a discount if customers buy the combo, as opposed to buying individual products. For example a motor spares retailer can set product bundles for service kits, which contain spark plugs, oil, filters etc.
- Accounting: this section shows your account balance, as well as the transactions done to date on your account. You can also request a withdrawal/payment of your full balance, or partial balance from here. Note that payments are processed offline, the system just sends a request to us to process the payment.
- Settings: you can specify the shipping/delivery method that you want to use here. By default, we have put "Pick up from store" and our internal delivery/shipping methods. You can also add your own delivery/shipping, if you are able to deliver to customers on your own. Should you need assistance in this regard, please contact your Member Consultant.
You can also upload files in this section. This will be useful for adding instruction manuals, downloads etc to products. - Contact Administrator: use this button to send a message to the Administrator.
- Refill balance: use this to make payments to SMEAZ. Typically this will be where you need to pay listing fees.
- Statistics: this section gives details in terms of your sales, orders, order statuses and the commission plan that you are on. You can amend your commission plan on this page.
Once your vendor account is set up, the next important activity is to set up your products/services.